Create a Wishlist
Instructions for How to Create an Amazon Wishlist for Tyler’s Dream
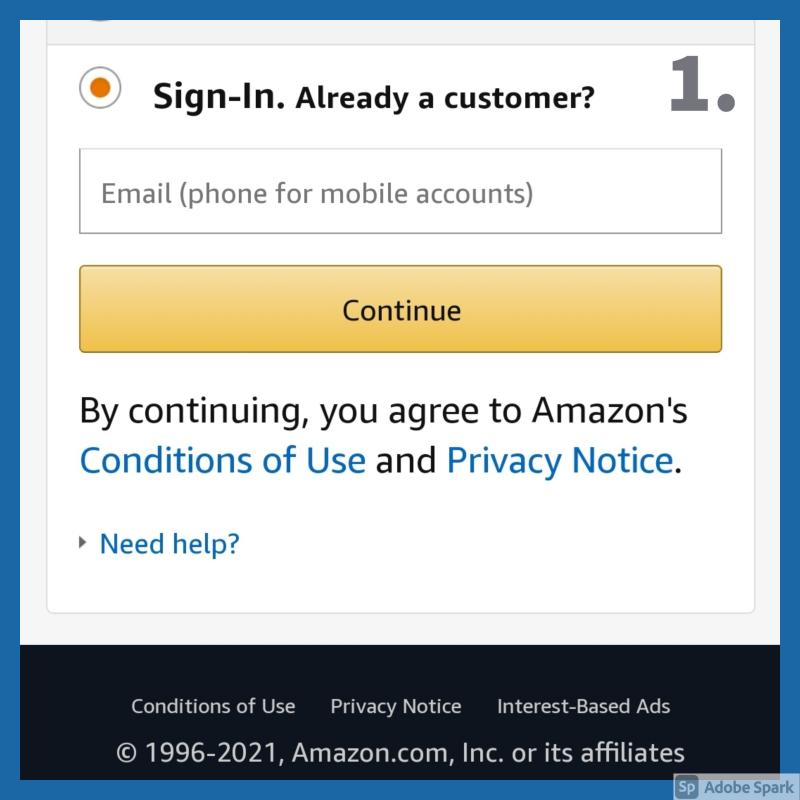
Step 1: Sign-in to Amazon.
Step 2: Open the hamburger menu (three lines) in the top left.

Step 3: Click on Lists.

Step 4: Click on View lists.

Step 5: Click on + Create a List.

Step 6: Enter a name for your list and click Create List.

Step 7: Click on the three dots on the top right to view the drop down menu.

Step 8: Click on manage list.

Step 9: Choose Shared for the Privacy select box.

Step 10: Change the recipient to your child’s first name. You do not need to add a birthday, email or description.

Step 11: Click on the Shipping Address select box and select the correct address.

Step 12: Once you select the correct address, check the 3rd party shipping check box. Then, click Save Changes in the upper right.

Step 13: Now you are ready to shop! When you fin an item, scroll down and you will see ADD TO LIST. Click on that and you can choose what list it goes on.

Things to Remember
- Make sure that all items are $20 and under.
- Choose only items that offer free or Prime shipping.
- You can narrow your search for items.
- Check your list periodically to verify that all items on the wishlist are still available and under $20.